vscode에서 NestJS의 Debug mode 설정
vscode에서 nestjs의 디버그 설정은 다음과 같습니다.
graph TD; A[nestjs run] -->|npm run start:debug| B(vscode debug setting); B --> C(vscode run debug); C --> D[debug test];
nestjs run
nestjs를 debug 모드로 실행합니다.
$ npm run start:debug
pacakge.json에 아래와 같이 --debug --watch설정이 되어 있습니다.
{
  "name": "nest-app",
  "scripts": {
    "start:debug": "nest start --debug --watch"
  }
}
vscode debug setting
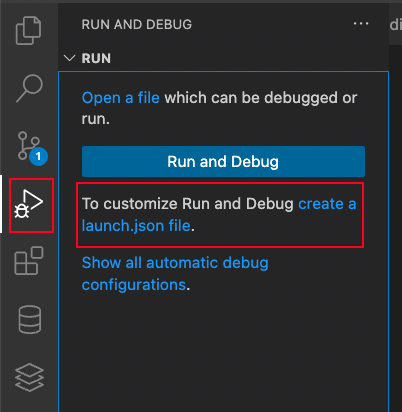
실행이 완료 되면, vscode의 Run and Degbug 메뉴로 이동을 합니다.
create a launch.json file을 클릭해서 새로운 launch.json을 생성합니다. 생성시 타입은 node로 설정합니다.

.vscode/launch.json 파일이 생성되면, 아래와 같이 작성합니다.
{
  // Use IntelliSense to learn about possible attributes.
  // Hover to view descriptions of existing attributes.
  // For more information, visit: https://go.microsoft.com/fwlink/?linkid=830387
  "version": "0.2.0",
  "configurations": [
    {
      "type": "node",
      "request": "attach",
      "name": "Attach NestJS WS",
      "port": 9229,
      "restart": true,
      "stopOnEntry": false,
      "protocol": "inspector"
    }
  ]
}
vscode run debug
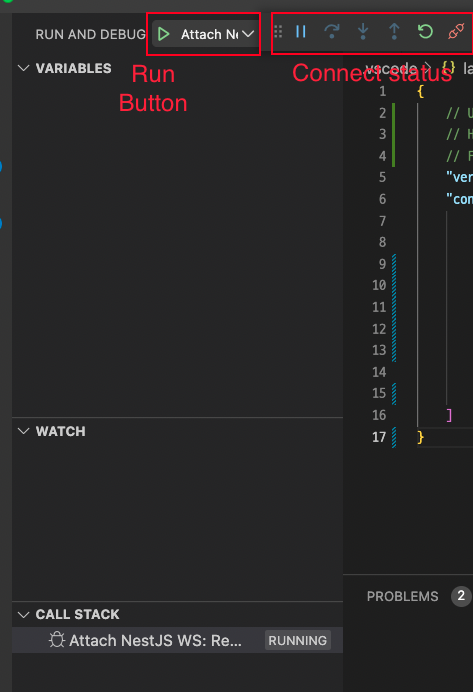
완료가 되면, debug를 실행합니다.

debug test
디버깅을 진행하려는 소스에서 포인트를 잡고 실행을 해서 디버그로 잡히는지 확인합니다.
디버그 모드 설정 전체 동영상
마치며
node에서 debug는 간단하게 기본 설정으로 했었지만, nestjs에서는 조금 다르게 설정해야 debug를 사용할 수 있습니다.